Tools required:
- Ratchet ring removal tool
- A sturdy bench-mounted or floor-mounted vice
- A built wheel
First you will need to disassemble the hub to access the ratchet ring. Once the hub is disassembled set the internals aside as you will only be working with the hub that is laced into the wheel for the first steps. NOTE: Keep hub laced into wheel for ratchet ring removal. For instructions on how to disassemble your hub please follow this link to Rear Hub Instructions.
1. You will need to Identify your ratchet ring:
- 24 tooth shown in (Fig. 1)
- 48 tooth shown in (Fig. 2)
Note: Do not mix the pawls and ratchet rings from 24T and 48T systems. Mixing ratchet rings with different pawls will result in hub failure.
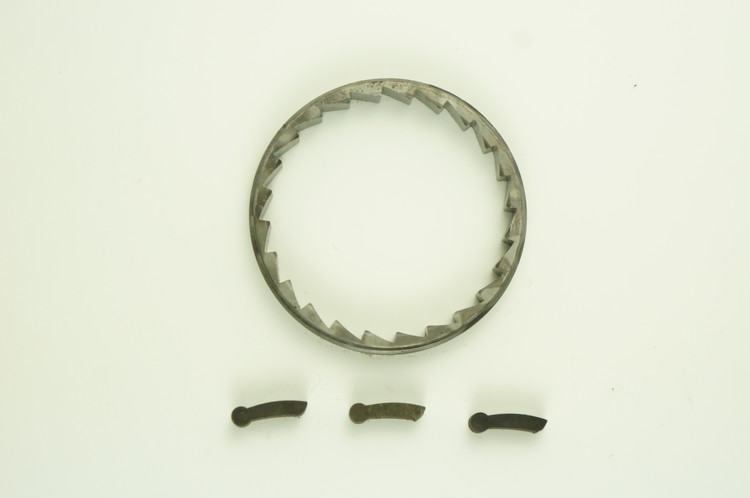
Fig. 1 24 tooth engagement pawls and ratchet ring. Note: pawl with one tooth at tip 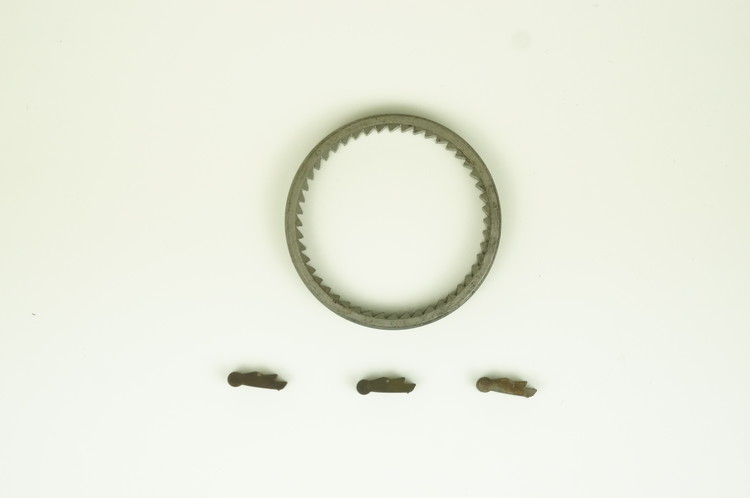
Fig. 2 48 tooth engagement pawls and ratchet ring. Note: pawl with two teeth at tip
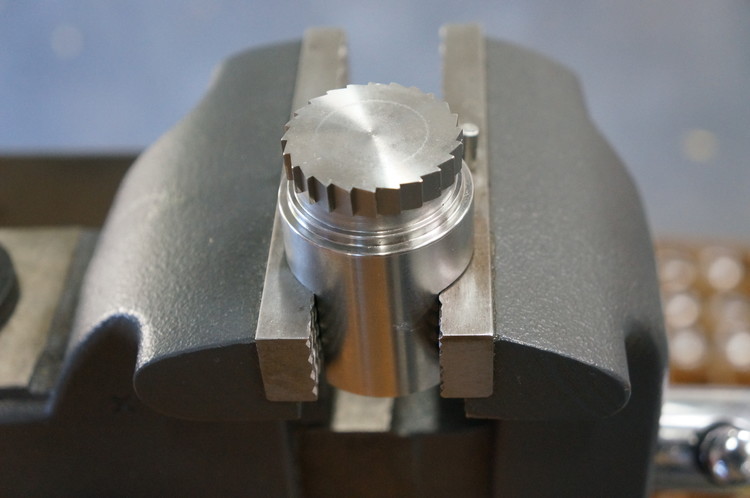
2. Install the ratchet ring removal tool so that flats are in the vice jaws. Tighten the vice down to secure tool (Fig .3).
3. Place the built wheel/hub shell on top of the tool lining up the ratchet ring with the spline on the tool. When in correct placement, the hub shell will be secure on the ratchet ring tool and the non-drive side hub shell will be facing up (Fig 4). Once the wheel is secure on the tool, spin the wheel COUNTER CLOCK WISE, making sure to keep the wheel/ratchet ring fully engaged with the tool. If the wheel has been ridden it will be difficult to remove. You may need an additional person assisting with the wheel to help loosen the ratchet ring (Fig 5).
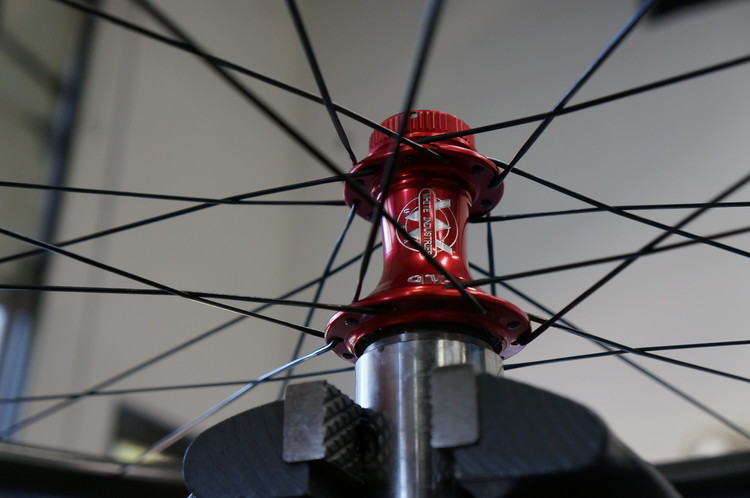
Fig. 4 Wheel engaged on tool 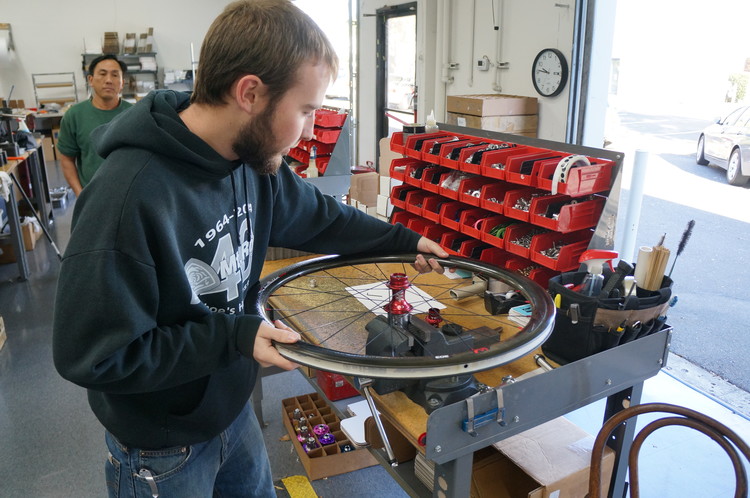
Fig. 5 Spinning the ring off the hub
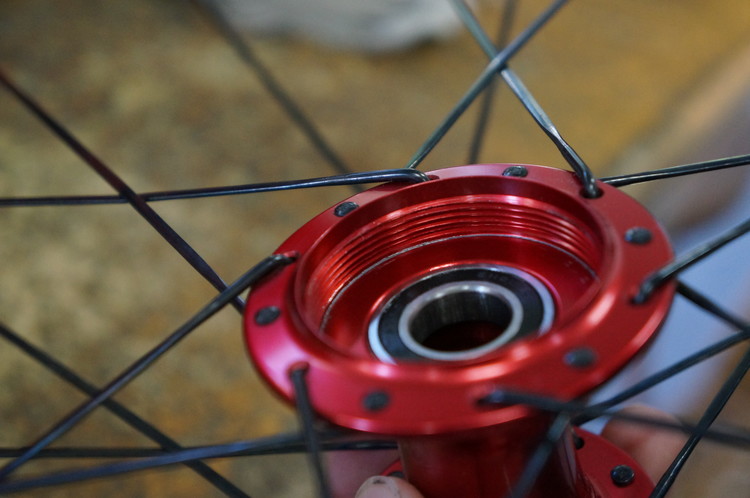
4. Once the ratchet ring is removed, clean out the inside of the hub and make sure the hub and threads are clean of any debris (Fig. 6).
5. Take your new ratchet ring and with the chamfered side facing out, hand thread it into the hub shell (Fig. 7). Make sure the ratchet ring threads all the way down until it is seated up against the internal face of the hub shell (Fig. 8).
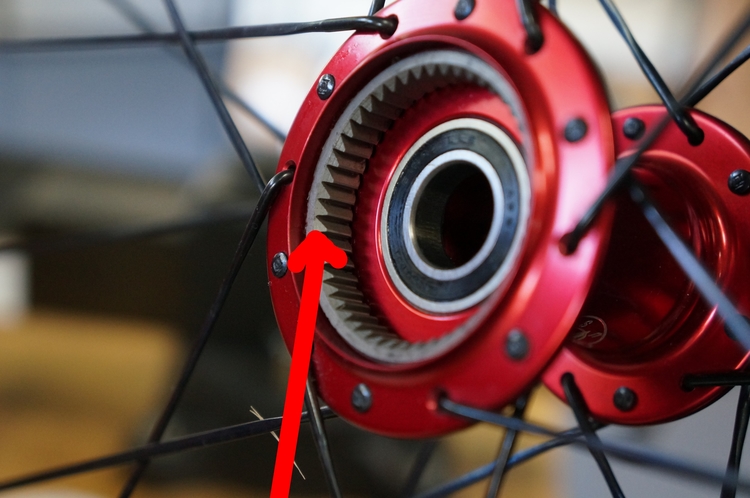
Fig. 7 Chamfered side faces out of the hub shell when threading the ratchet ring in 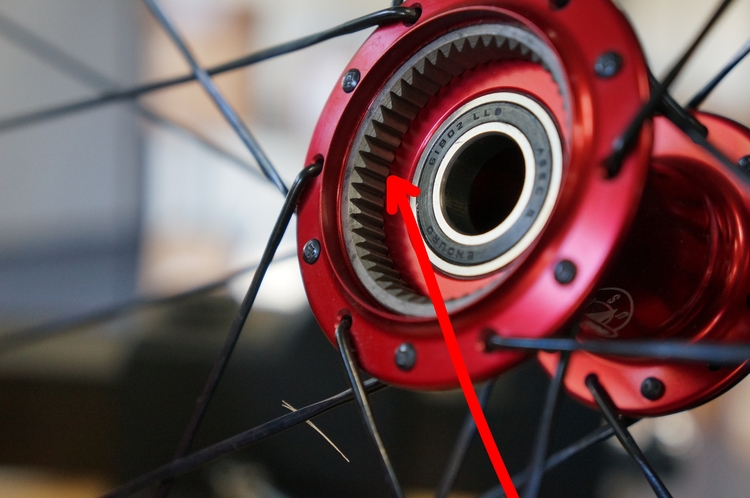
Fig. 8 Ratchet ring threads all the way down against the hubshell
6. After installing the ratchet ring, rebuild the hub with the internals you set aside. Caution: Make sure to use the proper pawls with the proper ratchet ring (Fig. 1 and Fig 2). The two tooth pawl must mate with the 48t ratchet ring and the one tooth pawl must mate with the 24t ratchet ring. If they are mixed – the hub will fail. See the Rear Hub Instructions if you need assistance with the hub assembly. Once the hub is assembled, go for a ride! Your first ride out will seat your ratchet ring in the hub and you’ll be set to ride for many enjoyable miles.